LW Larsen Photo
Related Articles

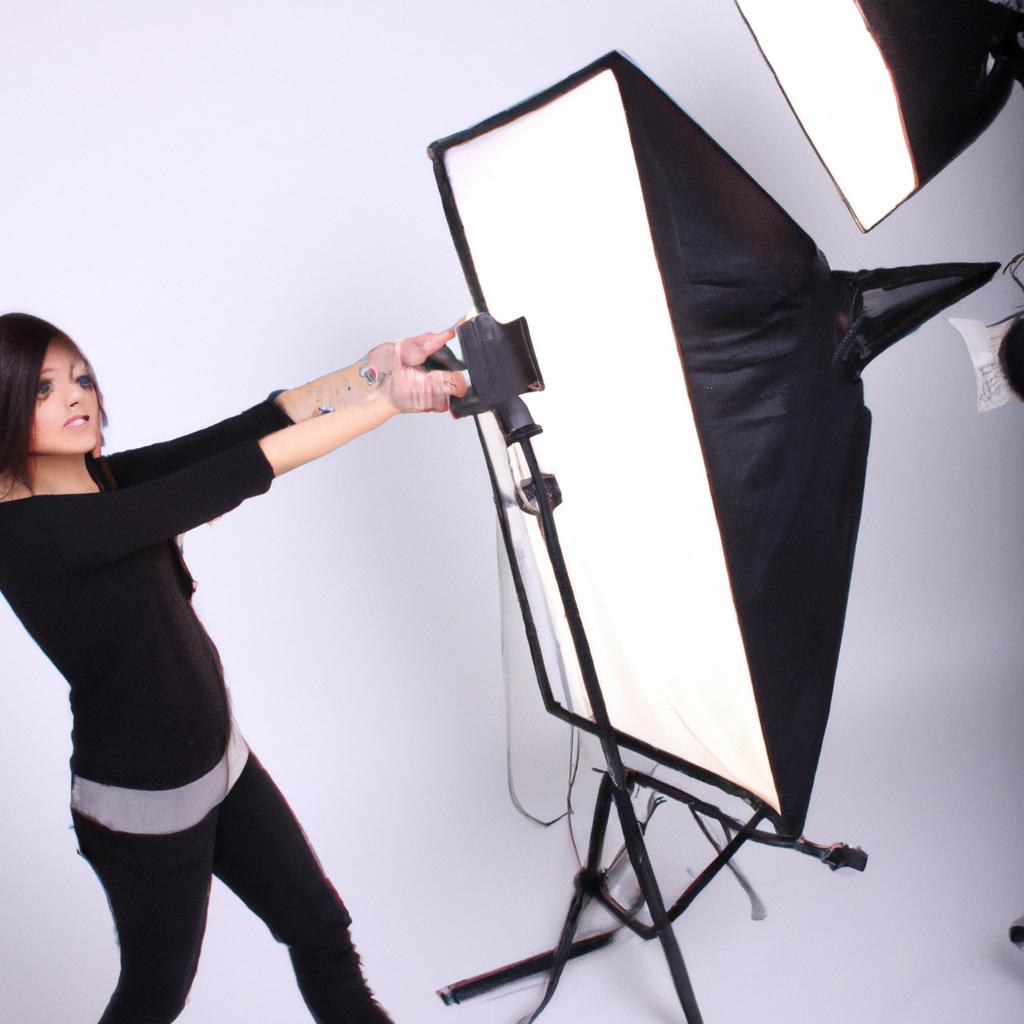
In the world of photography, one genre that continues to captivate both photographers and subjects alike is boudoir photography. This intimate style of photography celebrates sensuality and empowers individuals by capturing their beauty in a tasteful manner. However, achieving stunning results in boudoir photography heavily relies on mastering studio lighting setups and illuminating techniques. For instance, imagine a scenario where a photographer wants to capture an alluring portrait of a client posing in a dimly lit room adorned with soft candlelight. In order to recreate this ambiance within the confines of a studio setting, it becomes crucial for photographers to possess knowledge of effective lighting arrangements and techniques specific to boudoir photography.
To truly bring out the essence of boudoir photography through studio lighting setups, photographers must understand how different light sources can impact the mood and overall aesthetic of an image. Whether utilizing natural light, artificial strobes or continuous lights, each option offers its own unique set of advantages and challenges when it comes to creating compelling boudoir photographs. Additionally, factors such as color temperature, directionality, intensity, and diffusion play pivotal roles in achieving desired outcomes. By exploring various lighting setups tailored specifically for boudoir settings, photographers can effectively highlight the subject’s features while ensuring they are portrayed in a flattering and sensual manner.
One popular lighting setup for boudoir photography is the Rembrandt lighting technique. This technique involves placing a single light source at a 45-degree angle to the subject’s face, slightly above eye level. This creates a triangular patch of light on the opposite cheek, known as the Rembrandt triangle, which adds depth and dimension to the image. To achieve a softer and more romantic look, photographers can use a diffuser or reflector to soften the light source.
Another commonly used lighting setup in boudoir photography is butterfly lighting. In this setup, a single light source is positioned directly in front of the subject, slightly above eye level. The resulting shadow under the nose resembles a butterfly shape, hence the name. Butterfly lighting creates an elegant and glamorous look that accentuates facial features while maintaining softness.
For those aiming for a more dramatic and moody atmosphere, low key lighting setups work well in boudoir photography. This involves using minimal light sources with high contrast between light and shadow areas. By strategically placing lights around the subject or using gobos (light-blocking devices), photographers can create intriguing patterns and shapes that add mystery and allure to their images.
In addition to these specific setups, it’s important for photographers to have control over ambient light in the studio. This allows them to adjust the overall mood by incorporating or eliminating existing light sources such as lamps or candles.
Ultimately, mastering studio lighting setups for boudoir photography requires practice, experimentation, and an understanding of how different techniques can enhance or alter the desired aesthetic. By tailoring lighting arrangements to suit individual clients’ preferences and body types while keeping in mind factors like color temperature and diffusion, photographers can create captivating boudoir images that celebrate sensuality and empower their subjects.
Understanding the importance of lighting in boudoir photography
Understanding the Importance of Lighting in Boudoir Photography
When it comes to boudoir photography, lighting plays a crucial role in capturing stunning and intimate images. The careful manipulation of light can enhance the mood, emphasize certain features, and create an overall captivating atmosphere for these types of photographs. To illustrate this point, let’s consider a hypothetical example: imagine a boudoir photoshoot where soft, diffused lighting is used to highlight the curves and contours of the subject’s body, creating an alluring and sensual image.
One reason why lighting holds such significance in boudoir photography is its ability to evoke emotions and set the desired tone for the photographs. Through strategic placement and adjustment of lights, photographers can create various effects that convey different moods or themes. For instance, dimmed lighting with warm tones may create a sense of intimacy and romance, while brighter lighting with cooler tones might project confidence and empowerment. This versatility allows photographers to tailor their approach based on their clients’ preferences and desired outcomes.
To further understand the importance of lighting in boudoir photography, let us examine some key aspects:
- Directionality: Different directions from which light falls onto the subject can produce distinct results. Frontal lighting tends to minimize shadows and imperfections, resulting in softer portraits ideal for portraying beauty. On the other hand, side or backlighting can add depth by casting shadows strategically or outlining specific body parts.
- Light modifiers: Using accessories like diffusers or reflectors alters how light interacts with the subject. Diffusers soften harsh lights by scattering them over larger areas, reducing contrast between highlights and shadows. Reflectors bounce back light towards the subject to fill in shadows or accentuate certain details selectively.
- Color temperature: The color temperature of light affects both the mood and appearance of photographs. Warmer colors (e.g., yellowish-orange) tend to create inviting atmospheres often associated with sensuality or comfort. Cooler colors (e.g., bluish-white) can evoke a more edgy or dramatic feel.
- Light ratios: Balancing light intensities between different sources can help control the overall look of an image. By adjusting the ratio between key, fill, and accent lights, photographers can emphasize specific areas while maintaining a desired level of contrast.
In conclusion, mastering lighting techniques in boudoir photography is essential for creating captivating images that convey emotions and tell unique stories. Understanding how to manipulate directionality, modify light with accessories, work with color temperature, and manage light ratios enables photographers to achieve their intended artistic vision. The subsequent section will delve into another crucial aspect of studio lighting setups – choosing the right equipment.
Choosing the Right Equipment for Studio Lighting Setups
Choosing the right equipment for studio lighting setups
Understanding the importance of lighting in boudoir photography is crucial for creating captivating and intimate images. By skillfully manipulating light, photographers can evoke different moods and enhance the overall aesthetics of a boudoir photo session. Let’s explore some illuminating techniques that can be employed to achieve stunning results.
For instance, consider a hypothetical scenario where a photographer wants to create a sensual ambiance in their boudoir shoot. They decide to use soft lighting techniques to accentuate the model’s features while maintaining a gentle, romantic atmosphere. Softbox lights are commonly used in such situations as they produce diffused, flattering light that minimizes harsh shadows on the subject’s face and body.
To effectively utilize studio lighting setups for boudoir photography, it is essential to have an understanding of various illuminating techniques. Here are four key considerations:
-
Lighting Placement: Experiment with different positions for your lights to achieve desired effects. For example, placing one light source above and slightly behind the subject can create beautiful hair highlights or a halo effect.
-
Light Modifiers: Employing modifiers such as umbrellas or reflectors allows you to control and shape the quality of light falling on your subject. These tools help diffuse or redirect light, resulting in softer shadows or highlighting specific areas.
-
Color Temperature: Pay attention to the color temperature of your lights to set the mood appropriately. Cooler tones like blue may evoke tranquility, while warmer tones like orange or red can convey passion and intensity.
-
Control over Intensity: Adjusting the brightness level of your lights plays a significant role in determining how much detail is captured in both highlight and shadow areas within an image.
To better understand these concepts visually, refer to the following table showcasing examples of different lighting setups:
| Setup Type | Description | Mood | Example Image |
|---|---|---|---|
| Butterfly | Creates defined shadows | Dramatic | |
| Rembrandt | Produces triangle of light on the subject’s cheek | Intimate | |
| Split | Separates the face into two distinct halves with different lighting setups | Mysterious | |
| Rim | Illuminates only the edges or outlines of the subject, creating a halo effect | Glamorous |
In conclusion, understanding various illuminating techniques is vital for achieving remarkable boudoir photography results. By strategically placing lights, using appropriate modifiers, considering color temperature, and controlling intensity levels, photographers can create captivating images that exude sensuality, intimacy, drama, or mystery.
Transitioning into the subsequent section about “Exploring different types of lighting setups for boudoir photography,” let us delve deeper into these techniques to expand our repertoire of studio lighting approaches.
Exploring different types of lighting setups for boudoir photography
One example of a successful studio lighting setup for boudoir photography involves using a combination of softboxes and reflectors to create a flattering and sensual atmosphere. In this case, the photographer positioned two large softboxes at 45-degree angles on either side of the subject, providing even and diffused light that minimizes harsh shadows. A reflector was placed in front of the model, bouncing some of the light back onto her face to enhance her features.
To achieve stunning results in boudoir photography, consider incorporating the following techniques into your lighting setups:
- Controlling contrast: By adjusting the distance between your lights and subject or modifying their intensity, you can control the amount of contrast in your images. For softer and more romantic photographs, try reducing the overall contrast by moving your lights closer or lowering their power.
- Playing with color temperature: Different bulbs have varying color temperatures that can affect the mood and ambiance of your photos. Experimenting with warm or cool-toned lights can help evoke specific emotions within your audience.
- Utilizing props: Props such as sheer curtains or lace fabrics can be used creatively to manipulate light patterns and add depth to your compositions. They also contribute to creating an intimate setting while maintaining elegance.
- Incorporating unique poses: Encourage your subjects to experiment with various poses that complement the chosen lighting setup. This will allow you to capture dynamic shots showcasing both their beauty and confidence.
| Technique | Effect |
|---|---|
| Adjusting contrast | Creates desired level of drama |
| Manipulating color | Sets emotional tone |
| Enhancing depth | Adds visual interest |
| Capturing movement | Conveys energy and dynamism |
By exploring these diverse approaches when it comes to lighting setups for boudoir photography, photographers can bring out the best in their subjects, creating images that exude sensuality and allure. In the subsequent section on “Creating soft and flattering light for a romantic atmosphere,” we will delve further into techniques that enhance the overall mood of boudoir photography while emphasizing softness and romance.
Creating soft and flattering light for a romantic atmosphere
Building upon our exploration of different types of lighting setups for boudoir photography, let us now delve into the art of creating soft and flattering light to establish a romantic atmosphere. By mastering these techniques, photographers can capture intimate moments in a way that highlights their subjects’ natural beauty. To illustrate this further, consider the following hypothetical scenario:
Imagine a boudoir photoshoot set in an elegant bedroom adorned with satin sheets and delicate lace curtains. The photographer wants to create a dreamy ambiance while accentuating the client’s features. Through careful control of lighting, they achieve stunning results.
To achieve such captivating outcomes consistently, it is crucial to understand key principles behind illuminating techniques for boudoir photography. Here are some essential considerations when aiming to produce soft and flattering light:
- Diffusion: Using diffusers or softboxes helps spread the light source evenly across the subject, eliminating harsh shadows and minimizing skin imperfections.
- Directionality: Positioning lights at appropriate angles can enhance facial contours and emphasize desirable features like cheekbones or jawlines.
- Color Temperature: Adjusting color temperature settings allows for warm or cool tones, enabling photographers to evoke specific moods within their images.
- Multiple Light Sources: Employing multiple sources creates depth and dimension, introducing subtle variations in brightness that add richness to photographs.
| Lighting Setup | Effect on Mood |
|---|---|
| Butterfly Lighting | Elegance and Sophistication |
| Rembrandt Lighting | Mystery and Drama |
| Loop Lighting | Softness and Sensuality |
| Split Lighting | Intensity and Seduction |
By thoughtfully considering these factors during a boudoir photoshoot, photographers can create a mesmerizing atmosphere that celebrates the sensuality and beauty of their subjects. This attention to detail in lighting techniques intertwines with our next section, where we explore using creative lighting techniques to enhance mood and emphasize details during boudoir photography sessions.
Transition into Subsequent Section:
Continuing on the journey of capturing captivating boudoir photographs, let us now delve into the realm of using creative lighting techniques to further elevate the overall aesthetic appeal and evoke an even deeper emotional response from viewers.
Using creative lighting techniques to enhance mood and emphasize details
Creating captivating and aesthetically pleasing boudoir photographs goes beyond just capturing the subject in a flattering light. It requires utilizing creative lighting techniques to enhance the overall mood of the image and draw attention to specific details. By incorporating unique lighting setups, photographers can add an extra layer of depth and intrigue to their compositions.
Imagine a scenario where a photographer is shooting a boudoir session with the intention of highlighting the delicate lace details on the subject’s lingerie. To achieve this, they choose to use directional lighting from behind the subject, creating a subtle rim light that outlines these intricate features. This technique not only emphasizes the texture and design but also adds a touch of elegance and sensuality to the photograph.
When it comes to enhancing mood through lighting in boudoir photography, there are several effective techniques that can be employed:
- Softening shadows: By diffusing artificial lighting sources or using natural window light combined with sheer curtains or reflectors, photographers can minimize harsh shadows on their subjects’ faces or bodies. This helps create a more intimate and romantic atmosphere.
- Accentuating curves: Strategic placement of lights at certain angles can accentuate curves and contours, adding depth and dimension to the images. This technique allows for emphasis on sensual elements without appearing overly explicit.
- Creating silhouettes: Silhouettes can evoke mystery and allure by obscuring specific details while emphasizing body shape and form. Backlighting or placing strong lights behind the subject against darker backgrounds can effectively achieve this effect.
- Incorporating color gels: The use of colored gels over artificial lights can introduce ambiance and set a particular tone for each shot. Warm tones like reds or oranges convey passion, while cooler blues or purples suggest tranquility or sophistication.
To further illustrate how different lighting techniques impact boudoir photography, consider the following table showcasing four distinct setups along with their corresponding emotional response:
| Lighting Setup | Emotional Response |
|---|---|
| Soft, diffused light | Intimate and romantic |
| Dramatic side lighting | Bold and alluring |
| Subtle backlighting | Mysterious and sensual |
| Warm-toned gels | Passionate and fiery |
In conclusion, creating captivating boudoir photographs requires a thoughtful approach to lighting. By utilizing techniques such as softening shadows, accentuating curves, incorporating silhouettes, and using color gels, photographers can enhance the mood of their images while emphasizing specific details. These creative lighting setups add depth and intrigue to boudoir compositions, capturing the essence of sensuality with elegance.
Tips for achieving perfect lighting in boudoir photography
Building upon the concept of utilizing creative lighting techniques to enhance mood and emphasize details, we will now delve into advanced lighting setups specifically tailored for boudoir photography. By employing these illuminating techniques, photographers can achieve stunning results that accentuate the sensuality and intimacy captured in such intimate settings. Let us explore some key strategies that can elevate your boudoir photography to new heights.
Example:
To illustrate the impact of advanced lighting techniques in boudoir photography, let’s consider a hypothetical scenario. Imagine you are photographing a client in an elegantly decorated bedroom with soft, diffused natural light streaming through sheer curtains. To create a more dramatic ambiance and highlight certain features while maintaining a sense of romance, you decide to incorporate additional artificial lighting elements strategically.
In order to evoke an emotional response and intensify the overall aesthetic appeal of your boudoir images, consider implementing the following advanced lighting techniques:
- Silhouette Lighting: Create captivating silhouettes by backlighting your subject against a bright window or using strong overhead lighting.
- Accent Lighting: Utilize small spotlights or gels to draw attention to specific areas like curves or jewelry.
- Multiple Light Sources: Experiment with combining different types of lights (e.g., tungsten, LED, strobes) to add depth and dimension.
- Colored Gels: Enhance mood by placing colored gels over your lights to cast subtle hues onto the scene.
| Lighting Technique | Description | Emotional Impact |
|---|---|---|
| Silhouette | Emphasizes body contours; evokes mystery | Sensual, enticing |
| Accent | Highlights specific features; adds glamour | Elegant, alluring |
| Multiple Sources | Adds depth and texture; creates a three-dimensional effect | Rich, immersive |
| Colored Gels | Infuses scenes with colored tones; enhances mood | Romantic, dreamlike |
Incorporating these advanced lighting techniques can elevate your boudoir photography to an entirely new level of artistry. By thoughtfully considering the emotional impact each technique brings, you have the power to craft visually captivating images that resonate deeply with viewers. Through experimentation and creativity, explore how different lighting setups can further enhance the intimate atmosphere inherent in boudoir photography.